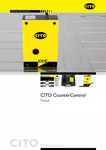
CITO CounterControl is an optical, non-contact measurement system for monitoring the width and depth of the creasing channel in Pertinax and the counter plate.
Reduce costs resulting from measurement errors by using CITO CounterControl. Optimise and secure your production process.
CITO CounterControl allows you to test the wear on Pertinax from repeated operations and thus prevent machine downtime in advance.
This measuring system makes it possible to achieve consistent measuring accuracy, independent of the operator. Complaints and measurement errors are now a thing of the past.
As an option, the measuring system is available equipped with a laptop computer.
Technical Data
- Measures the creasing channel depth
- Measures the creasing channel width
- Measures the radius at the floor of the creasing channel
- Measures the angle at the floor of the creasing channel
- Documents the measurements in the form of a PDF quality report
- Tolerance: 0.003 mm depth measurement
- Measuring width from 0.01 up to 8 mm
- Measuring depth from 0.001 up to 3 mm
| Description | Unit | Order no. |
|---|---|---|
| CITO CounterControl | 1 pc. | BYG00112 |
Product video CITO CounterControl
Learn more about how to use CITO CounterControl and our other test and measuring equipment in our online seminars.
Download
Stand: 2024-07-26T19:01:13+02:00
Software

Product leaflet


